Air Damper Assembly for GE Profile Refrigerator: A Comprehensive Performance Guide
Your GE Profile refrigerator isn’t just an appliance—it’s a precision cooling system designed to maintain optimal food preservation. At the heart of this performance lies an often-overlooked component: the air damper assembly. This small but mighty mechanism controls airflow between your fridge and freezer compartments, directly impacting temperature consistency, energy efficiency, and food quality.
Understanding how your air damper assembly works, recognizing when it needs attention, and knowing how to maintain it can extend your refrigerator’s lifespan and keep your groceries fresher longer. Whether you’re dealing with temperature fluctuations or planning preventative maintenance, this guide walks you through everything you need to know about optimizing this critical component.
Think of the air damper as the lungs of your refrigerator—it breathes cool air exactly where it’s needed, when it’s needed. When it functions properly, you barely notice it. When it fails, you’ll definitely know.
What Is an Air Damper Assembly?
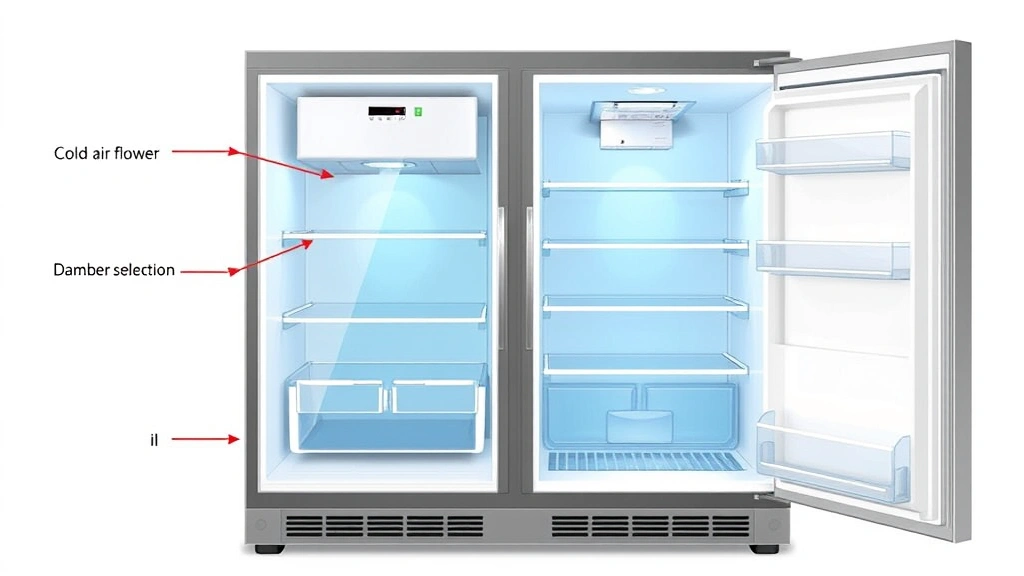
The air damper assembly is a motorized valve system that regulates the flow of cold air from your freezer compartment into the refrigerator section. In a GE Profile refrigerator, this component operates on a simple but elegant principle: controlled precision.
Your freezer generates extremely cold air—typically around 0°F or colder. The refrigerator compartment needs to stay around 35-38°F. Rather than using multiple cooling systems, GE engineered the air damper to modulate the exact amount of cold air that flows between compartments based on real-time temperature sensors.
This assembly consists of several integrated parts: a motorized damper door, control circuitry, temperature sensors, and airflow channels. When your refrigerator’s control board detects that the fridge compartment needs more cooling, it signals the damper motor to open wider. When temperatures reach the setpoint, the damper closes partially or fully to maintain stability.
The genius of this design mirrors the principles behind aero performance optimization—every component must work in harmony to achieve maximum efficiency. Just as aerodynamic systems reduce resistance and improve flow, your air damper assembly reduces energy waste while maximizing cooling distribution.
How It Works in Your GE Profile
GE Profile refrigerators use a sophisticated climate control system where the air damper assembly acts as the intermediary between your freezer’s extreme cold and your fridge’s moderate coolness. Understanding this process helps you appreciate why this component matters so much.
When you set your refrigerator temperature using the control panel, you’re essentially telling the system what temperature you want. The thermistor (temperature sensor) in the fridge compartment continuously monitors actual conditions and reports back to the control board. If the fridge is warmer than your setpoint, the control board sends a signal to open the damper wider, allowing more cold air to flow in. If it’s colder than desired, the damper closes to restrict airflow.
This cycle repeats hundreds of times daily, creating a dynamic equilibrium. The system doesn’t just open and close the damper—it modulates it to precise positions, allowing for incredibly fine temperature control. This is why GE Profile models maintain such impressive temperature consistency compared to basic refrigerators.
The engineering here parallels ace performance principles in other systems: precision control beats brute force every time. Rather than cycling a compressor on and off aggressively, the air damper allows the existing cooling capacity to be distributed intelligently.
In older GE Profile models, this system has proven remarkably reliable. However, the motorized damper door and its mechanical linkages experience wear over years of operation. The motor can lose responsiveness, the damper door can warp or crack, and the control circuitry can degrade. When these failures occur, temperature control suffers immediately.
Signs Your Air Damper Needs Attention
Your refrigerator communicates problems through behavior changes. Learning to read these signals helps you catch air damper issues before they compromise food safety or create larger problems.
Temperature Inconsistency: The most obvious sign is fluctuating temperatures. You might notice your fridge running warmer than usual, or conversely, your frozen foods developing frost while the fridge compartment feels too cold. These swings indicate the damper isn’t modulating properly.
Freezer Too Warm: If your freezer temperature climbs above 10°F while the fridge stays cold, the damper might be stuck open, allowing too much cold air to bypass the freezer. This seems counterintuitive but happens when the damper fails to close properly.
Fridge Too Warm: The opposite problem—a stuck-closed damper—leaves the fridge compartment without adequate cold air. Your fridge might run 5-10°F warmer than your setpoint despite the compressor running constantly.
Unusual Compressor Cycling: If your compressor runs almost continuously without achieving proper temperatures, the air damper might be malfunctioning, forcing the compressor to work overtime trying to cool compartments it can’t reach.
Visible Frost or Ice Buildup: Excessive frost around the damper area or unusual ice patterns suggest airflow problems. The damper opening might be partially blocked or the door might be warping.
Audible Changes: A clicking, grinding, or buzzing sound near the back of the refrigerator could indicate damper motor problems. Normal operation should be nearly silent.
These warning signs matter because they affect food safety. Understanding 3 ways to improve work performance in appliance maintenance means addressing issues promptly rather than waiting for catastrophic failure.
Maintenance and Care Best Practices
Preventative maintenance extends your air damper assembly’s lifespan and keeps your GE Profile performing optimally. These practices require minimal effort but yield significant benefits.
Regular Coil Cleaning: Your refrigerator’s condenser coils accumulate dust and pet hair over months and years. When these coils clog, the compressor works harder, forcing the damper to work harder. Clean coils behind and beneath your refrigerator every 3-6 months using a brush or vacuum. This simple step reduces strain on all components, including the air damper.
Proper Airflow Maintenance: Never block the vents in your refrigerator or freezer compartments. These vents channel air from the damper assembly. Blocked vents force the system to compensate, creating temperature imbalances. Keep the back of your refrigerator clear too—allow at least 2 inches of space for air circulation around the unit.
Temperature Setting Discipline: Resist the urge to constantly adjust your refrigerator temperature. Every adjustment signals the damper to reposition. Frequent adjustments create unnecessary wear. Set your fridge to 37-38°F and freezer to 0°F, then leave them alone unless you notice actual temperature problems.
Door Seal Inspection: Worn door seals force your refrigerator to work harder, which stresses the damper assembly. Check that your fridge and freezer doors seal completely. If you can slide a piece of paper around the seal easily, it’s time for replacement.
Much like optimizing AC window unit energy efficiency, maintaining your refrigerator’s efficiency preserves component longevity. Energy-efficient operation means less stress on every part, including your air damper.
Load Management: Avoid overstuffing your refrigerator. Packed compartments restrict airflow from the damper assembly, creating dead zones where air can’t circulate effectively. Leave some space between items so cold air can flow freely.
Regular Defrost Cycles: Many older GE Profile models include automatic defrost cycles. Ensure these run uninterrupted. The defrost cycle helps prevent ice buildup that could interfere with damper operation.
Troubleshooting Common Issues
When problems arise, systematic troubleshooting narrows down the issue quickly. Not every temperature problem stems from the air damper—sometimes the culprit lies elsewhere.
Testing Temperature Stability: Before assuming damper failure, monitor temperatures for 24 hours. Place a thermometer in both compartments and record readings every few hours. True damper problems show dramatic fluctuations (10°F+ swings), while other issues typically show gradual drifts.
Checking for Airflow: Feel the vents in your fridge compartment. You should feel cold air flowing during cooling cycles. No airflow suggests a damper problem, while weak airflow might indicate a blocked vent or clogged coils.
Listening for Motor Operation: When your compressor cycles on, listen carefully for a soft clicking or buzzing sound near the back wall. This indicates the damper motor engaging. Silence might mean the motor has failed.
Visual Inspection: If you’re comfortable removing your refrigerator’s back panel or accessing the damper assembly area, look for visible damage, frost accumulation, or mechanical obstruction. Consult your manual for safe access procedures.
Control Board Testing: Some temperature issues stem from the control board rather than the damper itself. If your damper seems stuck in one position regardless of temperature changes, the control board might not be sending signals correctly.
According to Psychology Today’s research on problem-solving, systematic troubleshooting—testing one variable at a time—outperforms random troubleshooting significantly. Apply this principle to appliance diagnostics.
Replacement Guide
When your air damper assembly truly fails, replacement becomes necessary. For older GE Profile models, this process is manageable with basic mechanical aptitude.
Before You Begin: Unplug your refrigerator completely. This ensures your safety and protects the control board from electrical surges. Allow the unit to sit unplugged for 5 minutes to discharge residual power.
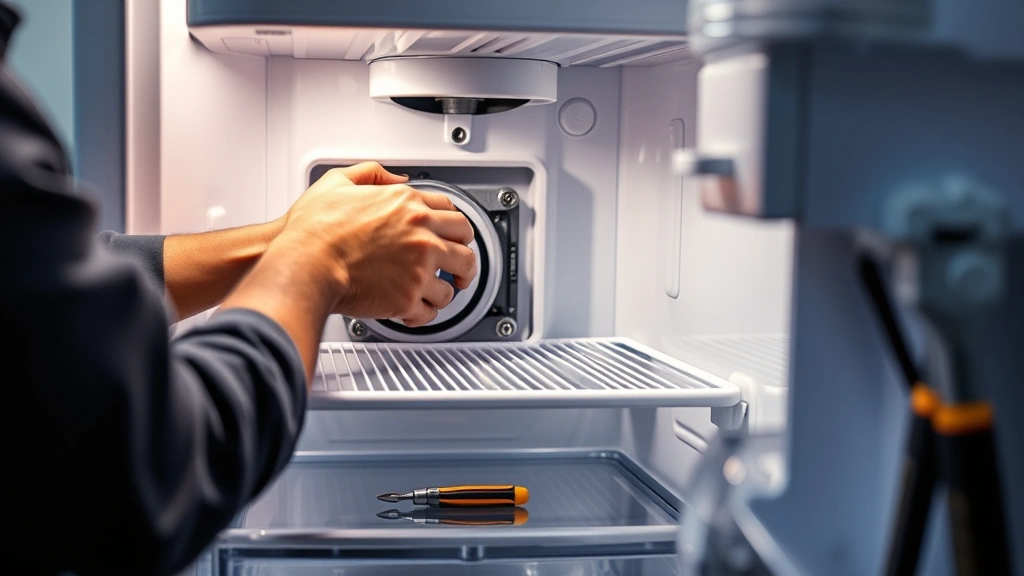
Locating Your Damper Assembly: The air damper typically sits in a channel behind the refrigerator’s back wall, between the freezer and fridge compartments. Some models allow access from inside the refrigerator by removing shelves and accessing a panel. Others require removing the back panel. Your model’s manual provides exact specifications.
Removing the Old Assembly: Carefully disconnect the motorized damper from its mounting brackets and unplug the electrical connector. Note the connector orientation before disconnecting—take a photo if helpful. Gently remove the damper door if it’s separate from the motor assembly.
Installing the New Assembly: Position your replacement damper in the same location and orientation. Reconnect the electrical connector, ensuring it seats fully. Mount the damper securely to its brackets. Double-check that the damper door moves freely without obstruction.
Testing Before Reassembly: Plug in your refrigerator and let it run for 5 minutes. Feel the vents to confirm airflow. Listen for the damper motor engaging and disengaging as temperatures fluctuate. If everything sounds and feels normal, proceed to reassemble panels and shelves.
Post-Installation Monitoring: After replacement, monitor temperatures closely for the first 24 hours. Temperature should stabilize within 2-3 hours as the system recalibrates. Contact the manufacturer or a service professional if issues persist.
The Appliance Repair Experts Association recommends having replacement parts tested before installation when possible. Quality matters—inferior replacement dampers fail prematurely.
For those seeking professional installation, your local GE service center or authorized appliance repair specialists can handle this work efficiently. The investment in professional service often pays for itself through proper installation and warranty coverage.
Frequently Asked Questions
How long does an air damper assembly typically last?
In properly maintained GE Profile refrigerators, air damper assemblies often last 10-15 years or longer. However, usage patterns, environmental factors, and maintenance quality significantly impact lifespan. Units in kitchens with poor ventilation or frequent temperature adjustments may fail sooner. Regular maintenance—particularly coil cleaning and proper airflow management—extends lifespan considerably.
Can I repair my air damper assembly, or must I replace it?
Most modern air damper assemblies are sealed units that cannot be repaired. If the motor fails or the damper door cracks, replacement is typically necessary. However, some issues that appear to be damper problems—like stuck dampers—can sometimes be resolved by cleaning ice buildup or checking electrical connections. Always troubleshoot thoroughly before committing to replacement.
What’s the cost of replacing an air damper assembly?
Replacement costs vary based on your specific GE Profile model. Parts typically range from $150-$400, while professional installation adds $100-$300 in labor. Total replacement costs usually fall between $250-$700. Older models may have higher parts costs due to discontinued inventory. Check with authorized GE dealers for exact pricing for your model.
Will my refrigerator work without an air damper assembly?
Technically, no—your refrigerator won’t work properly without a functioning damper. The system depends on this component for temperature regulation. Operating without it would result in either a constantly freezing fridge or a perpetually warm freezer, compromising food safety. The damper is essential, not optional.
How do I know if my damper motor is failing versus the damper door being stuck?
Listen carefully when your compressor cycles on. If you hear the motor trying to engage (clicking or buzzing) but the damper doesn’t move, the motor likely works but the door is mechanically stuck. If you hear nothing—complete silence—the motor has probably failed. Visual inspection of the damper door can reveal mechanical obstructions like ice or debris.
Can poor damper performance affect my energy bill?
Absolutely. A malfunctioning damper forces your compressor to run longer and harder trying to achieve target temperatures. This increased runtime directly increases electricity consumption. Homeowners often notice 10-20% higher energy bills when their damper fails. Prompt repair or replacement typically restores normal energy efficiency.
Is preventative damper replacement recommended?
Most manufacturers and service professionals don’t recommend preventative replacement unless your damper is showing clear signs of failure. Replacing a functioning component wastes money and creates unnecessary complexity. However, if your refrigerator is 12+ years old and you’ve experienced temperature problems, preventative replacement might make sense to avoid future failures.
How does humidity affect air damper performance?
High humidity can contribute to frost and ice buildup around the damper assembly, potentially restricting movement. Kitchens with poor ventilation or high ambient humidity sometimes experience accelerated damper issues. Ensuring proper kitchen ventilation and maintaining appropriate refrigerator humidity levels helps protect your damper assembly.